 WordPress 3.4 is here and its time to checkout whats new in the box. Three features stand out – The Theme Customizer, Twitter Embed and HTML Support for Image Captions. (Yeah yeah, the stuff that they show on the Welcome page 😉
The default themes, Twenty Ten and Twenty Eleven are also updated to support the Theme Customizer, but you aren’t using the default theme, are you? But that doesn’t mean you can’t use the feature, here is how you can make the most of it.
Adding Theme Customizer Support For Your Theme
I have used the Cutline 2.2 theme for an example here. With this tutorial you should be able to add Custom Header Support, Custom Background Image and Custom Background Color to the theme.
Creating a Custom Header Area
Open up your functions.php and add the following code to it, somewhere it would look nice. This will tell WordPress that your theme supports Custom Headers:
// Custom Header

$args = array(

'flex-width' => false,

'width' => 896,

'flex-height' => false,

'height' => 163,

'default-image' => get_template_directory_uri() . '/images/header_1.JPG',

);

add_theme_support( 'custom-header', $args );
As you can see above, change the width and height as per your theme’s header image. Also the location of the default image. You can find more arguments here: http://codex.wordpress.org/Custom_Headers
Now its time to set the default image and its thumbnail:
// Setting Default Header Image

register_default_headers( array(

'one' => array(

'url' => '%s/images/header_1.jpg',

'thumbnail_url' => '%s/images/header_1_thumb.jpg',

'description' => 'First Image'

),

) );
Then you need to pull this image from your header.php. Open up header.php and replace the header image with this:
<img src="<?php header_image(); ?>" height="<?php echo get_custom_header()->height; ?>" width="<?php echo get_custom_header()->width; ?>" alt="" />
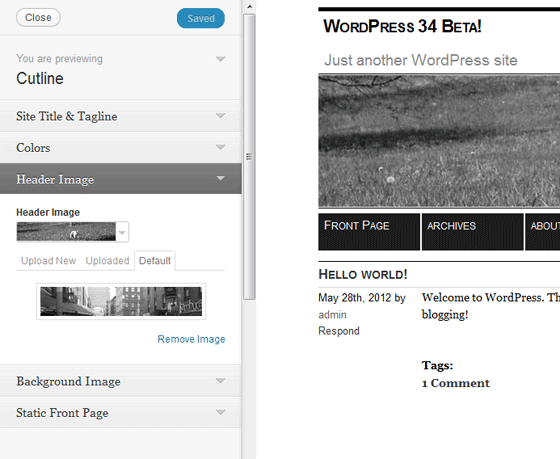
Here is how it looks like on the Theme Customizer
Now it’s a matter of adding the Custom Background Image Support. Again to functions.php add:
// Custom Background and Color

$args = array(

'default-color' => '000000',

'default-image' => get_template_directory_uri() . '/images/light-tile.gif',

);

add_theme_support( 'custom-background', $args );
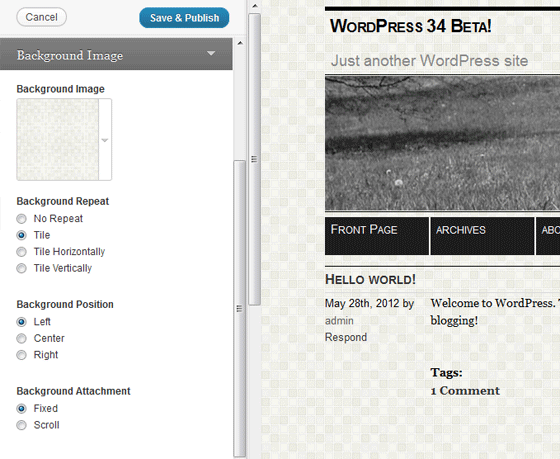
And that shows up like this on the Theme Customizer
Time to Test Out Twitter Embed
Moving on, lets see what happens when I paste this tweet:
WordPress 3.4 is here! Update your site now to try the new theme customizer, better headers, HTML captions & more: http://t.co/tHpz0Mau
— WordPress (@WordPress) June 13, 2012
And For the HTML in Image Captions

This Caption Uses
So Much HTML!
Upgrade and have fun!






Hey Arun,
First of all a big thanks. At first I’ve only 3 options in theme customize option, Now i,ve all the options after followed your tutorial.
Regards,
Vivek,
Awesome! Glad to be of help 🙂
Nice code to customize the wordpress theme. Thanks for sharing such a good CSS Code.
First of all a big thanks. At first I’ve only 3 options in theme customize option, Now i,ve all the options after followed your tutorial.